Sewing resources

Here you can get help on how to assemble our PDF sewing patterns. The helpful guides can be download as a PDF document, is both English and German.

English:  How to connect the individual paper pages to assemble the PDF pattern.

Deutsch: A4-Seiten als PDF-Muster zusammensetzen.

How to assemble the PDF patterns

Each guide that comes with the PDF pattern has print layouts for both A4 and US-Letter-sized paper. These layouts also indicate how many pages are required.

Ensure you print the pattern at 100% scale using a dedicated PDF reader, such as Adobe Reader, on a desktop computer. Importantly, I do NOT recommend printing these patterns by opening the PDF file directly in a browser such as Firefox or Chrome, or from a phone. Unfortunately, the new built-in PDF readers on phones and browsers are beginning to produce incorrect printouts that often distort the pattern's scale unexpectedly.  Check that the scale is printed correctly on the first page, then proceed to print the remaining pages.

The lines of the pattern pieces will print approximately 1–1.5 cm in from the edges of the paper, depending on whether A4 or US Letter size paper is used.

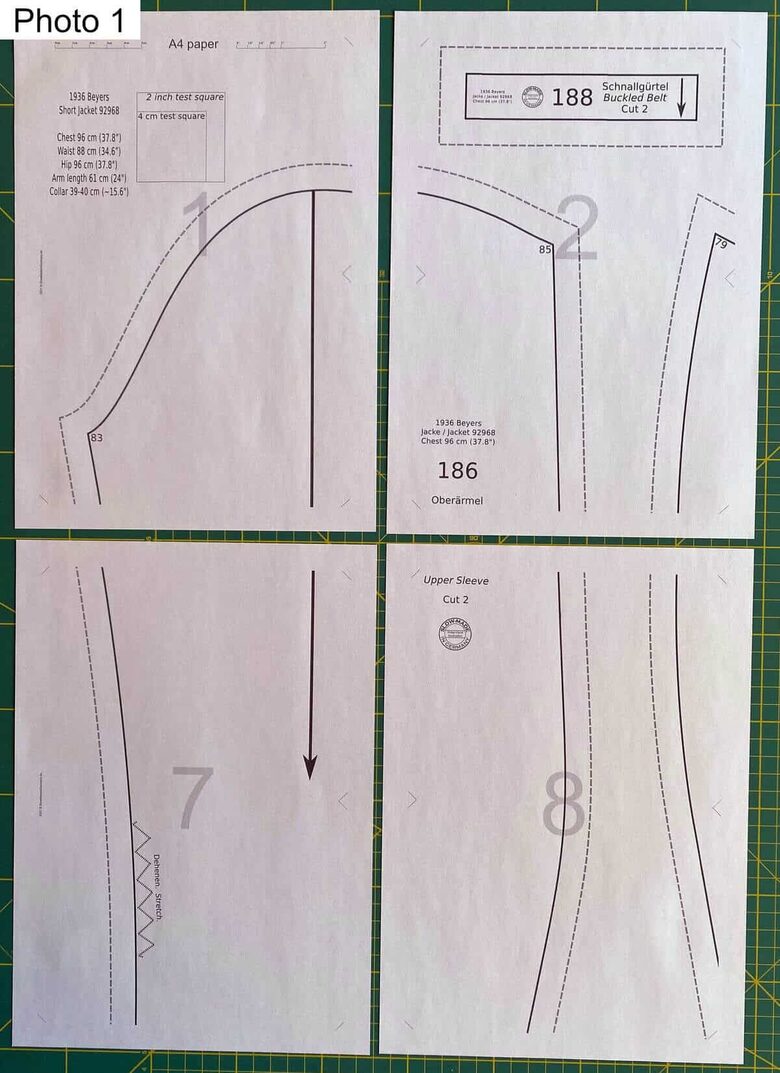
For example, in Photo 1 below, the right edge of page 1 connects with the left edge of page 2 and the bottom edge of page 1 connects with the top edge of page 7.

The two pages that need to be connected together will always require one edge to overlap and the other to underlap. The overlapping edge needs to be cut and taped onto the underlying edge that has not been cut.

How to assemble pages of a PDF sewing pattern.

Trim the edge that will overlap:

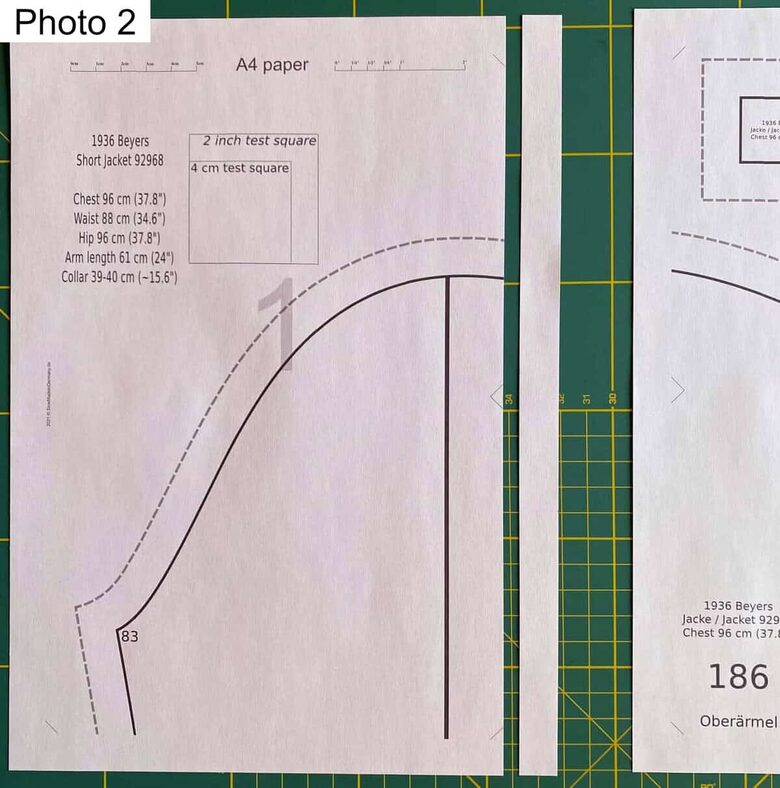
See Photo 2.

Trim off the excess from the right side of page 1. Use the ends of the triangles as a guide for trimming.

Many of our newer patterns feature a page border as well as triangles. In these cases, cut along the border on the side that will overlap.

Preparing pages of PDF sewing pattern

Match the small triangles on two adjoining pages:

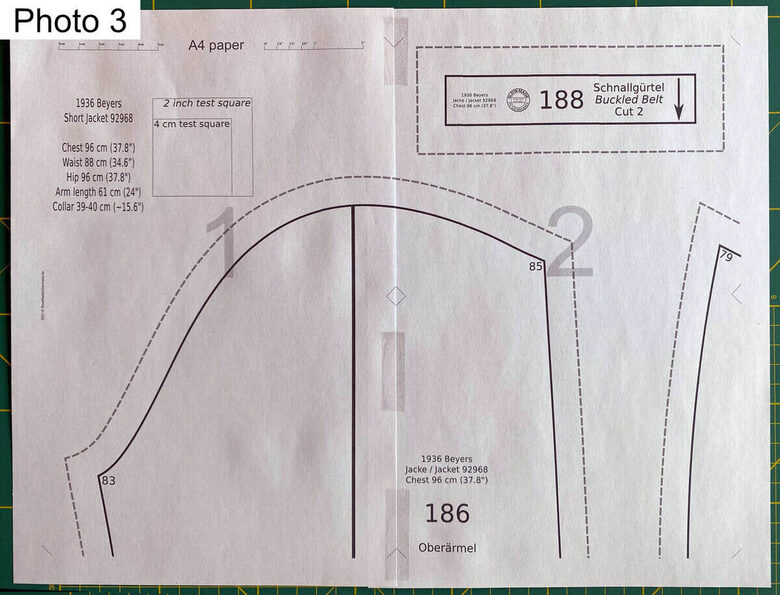
See Photo 3.

Place the trimmed edge of page 1 on top of the left-hand edge of page 2. Use the small triangles to align the pages.

The individual lines of the pattern pieces (seam lines, etc.) will match up accurately, so do not remove any of these when trimming the edges.
Join pages of a PDF sewing pattern together

Match the triangles to join another row of pages:

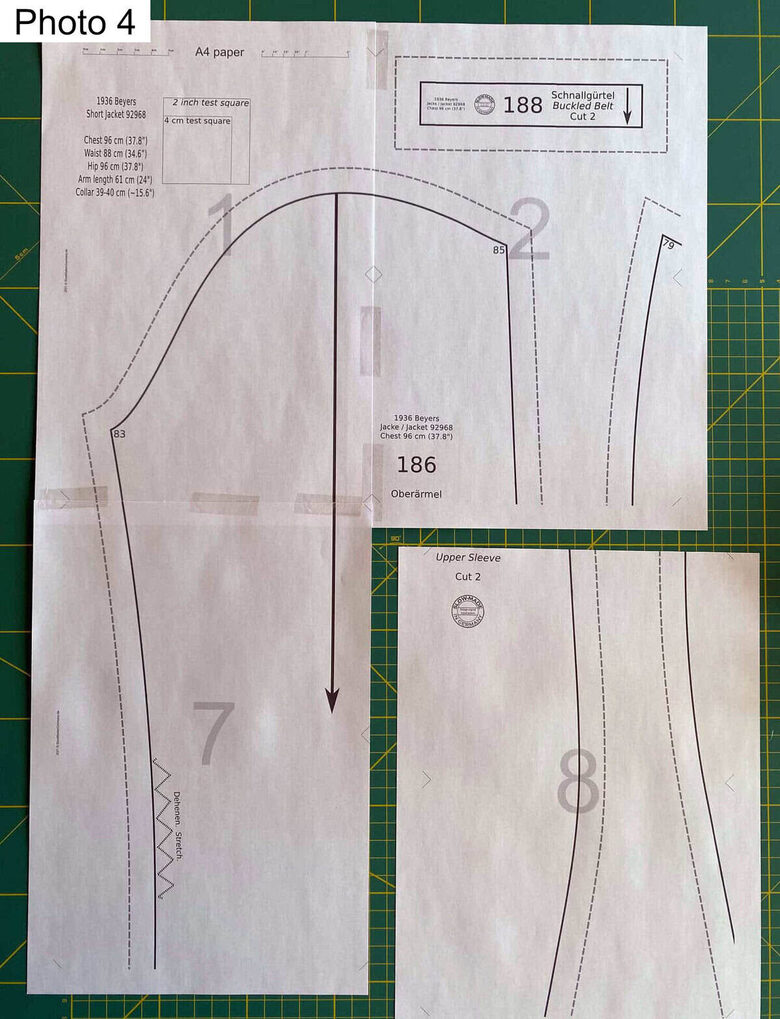
See Photo 4.

As you can see, the small triangles (and the page borders on the newer patterns) provide a guide for trimming the overlapping pages and positioning them together. In this example, the top and left edges of page 8 have been trimmed, and the page will be then placed on top of pages 2 and 7.

When the edges of four pages meet at a corner, the triangle markings form a symmetrical diamond shape.

Assembling cut edges of a PDF pattern

PDF pattern pieces joined correctly:

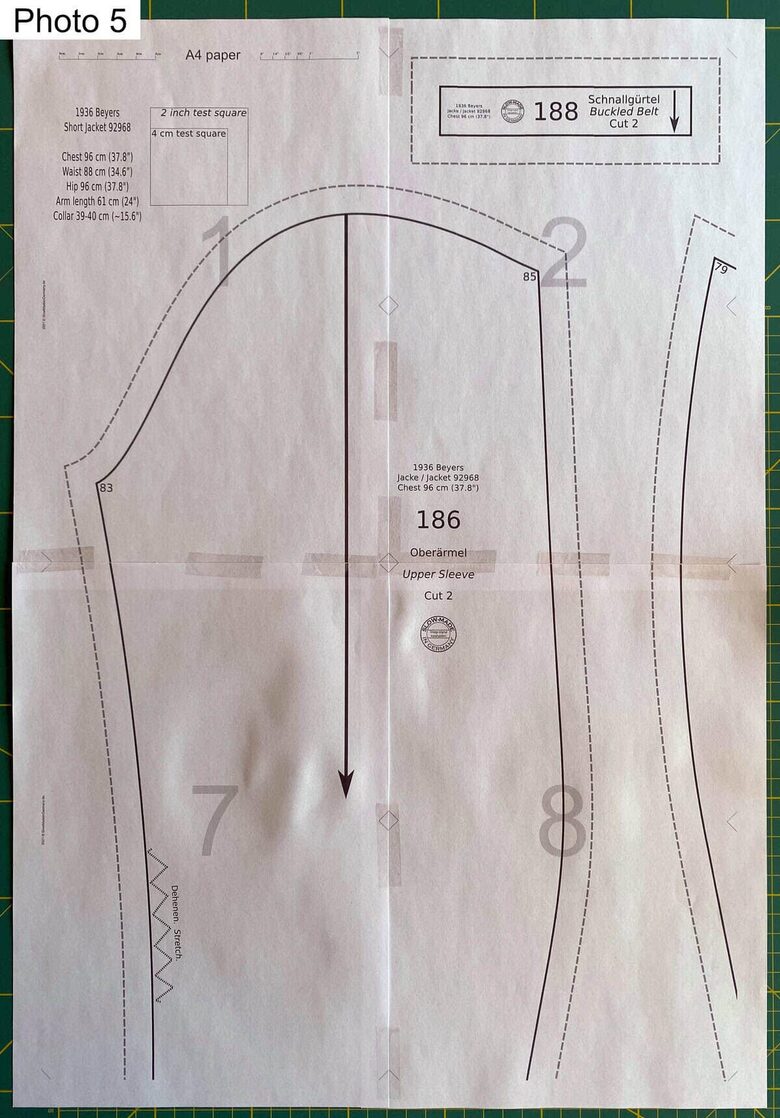
See Photo 5. 

This photo shows the four pages joined together. The remaining pages will be trimmed and joined in the same way.

Joining the pages of a PDF sewing pattern